Raspberry Pi Zero W on Battery Power
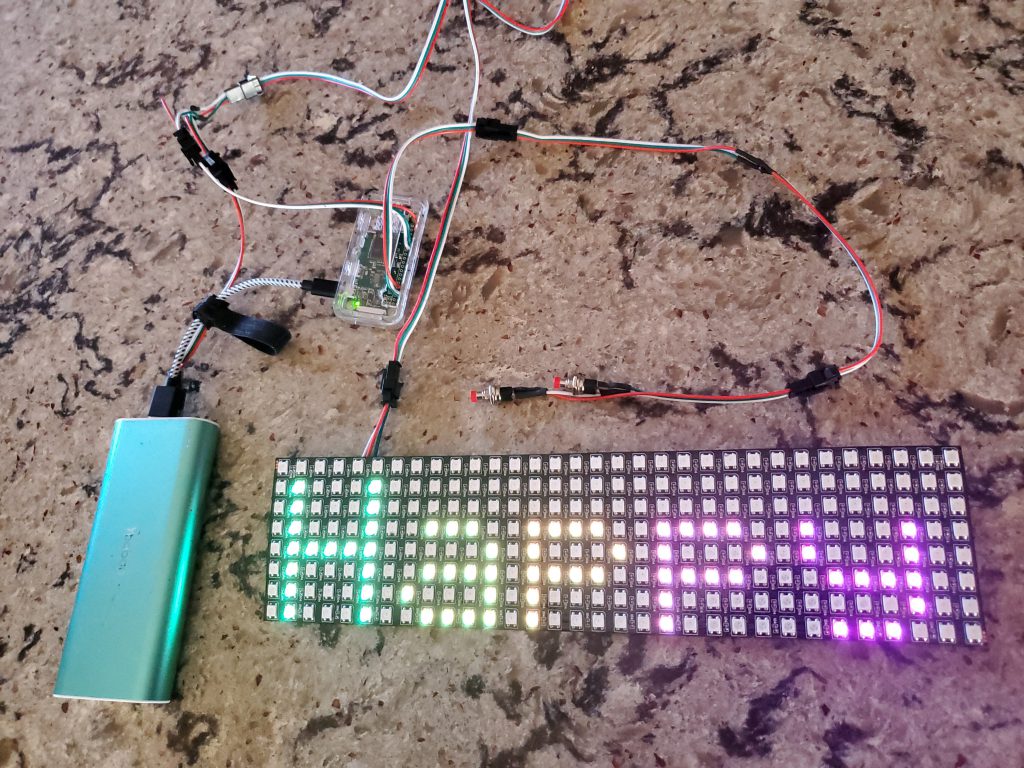
Raspberry Pi Zero on Battery Power. Then, Raspberry Pi Zero on battery power, connected to an LED matrix.
Raspberry Pi Zero W connected to a fully charged Yoobao 10000mAh Power Bank. Note: wi-fi was on, but no monitor, no keyboard, and no mouse was connected for these tests.
Nothing connected: 2 days 10 hours
START Thu 12 Nov 2020 04:48:34 PM CST
END Sun 15 Nov 2020 03:01:15 AM CST
Connected to 256-LED matrix displaying “Happy Halloween”: 14 hours
START Wed 18 Nov 2020 07:44:34 PM CST
END Thu 19 Nov 2020 10:17:48 AM CST
Confirmed: the Pi Zero will not transfer enough power to the 256-LED matrix from its GPIO 5V pin. The Pi will shut itself down with low-voltage, as soon as the LED matrix is plugged in, even though there are no “on” pixels, and even when the Pi itself is connected to a 3.0A power supply. The matrix must have an independent 5V power supply.
Parts List
| Part | Price |
|---|---|
| Raspberry Pi Zero W Kit Complete Starter Kit | $38 |
| BTF-Lighting WS2812B RGB 5050SMD 8×32 LED Matrix | $24 |
| Yoobao Portable Charger 10000mAh | $24 |
| 3 Pin Plug 15cm wire for WS2812B, 20 Pairs | $10 |
| 2 meter 3 Pin connector cable, 4 pcs | $10 |
| USB Breakout Board, 10 pcs | $8 |
Note that the Raspberry Pi 4 is the start of a new ecosystem of connectors. By getting the “Complete Starter Kit”, you acquire (1) A USB hub that uses micro-USB to provide four USB-A connectors to the Pi Zero [for your keyboard and mouse], (2) A 5ft mini-HDMI to HDMI cable to connect the Pi Zero to a monitor, (3) A case that provides access to the GPio pins.
Wiring was done by soldering the 3 Pin connectors directly to the Zero board (the one time when not having pre-installed headers worked in my favor).
The software that scrolls text over the matrix is all custom. It is based on the Pi ws2812 rgb LED strips library to control the individual LEDs.
Fritzing diagram of components
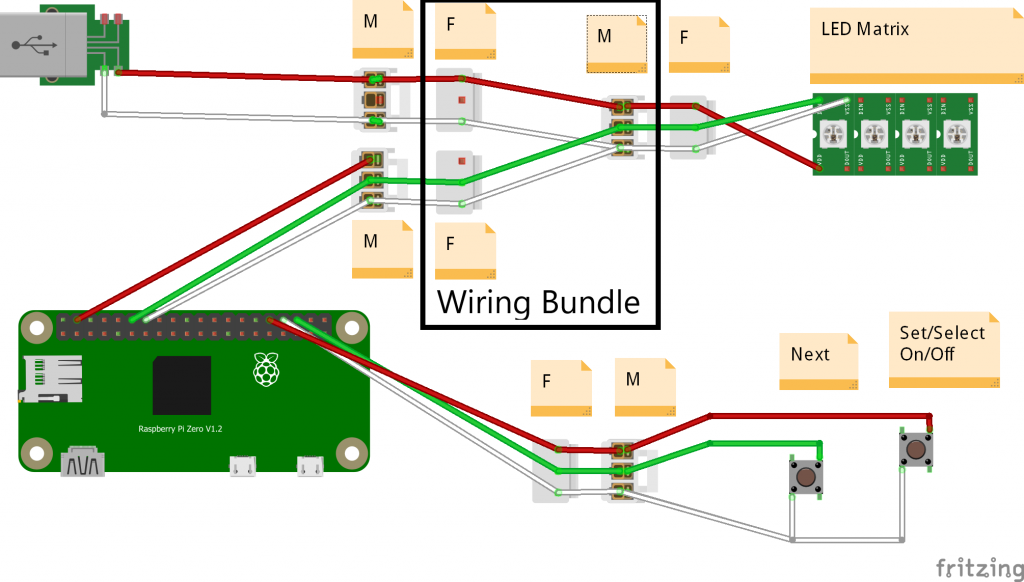
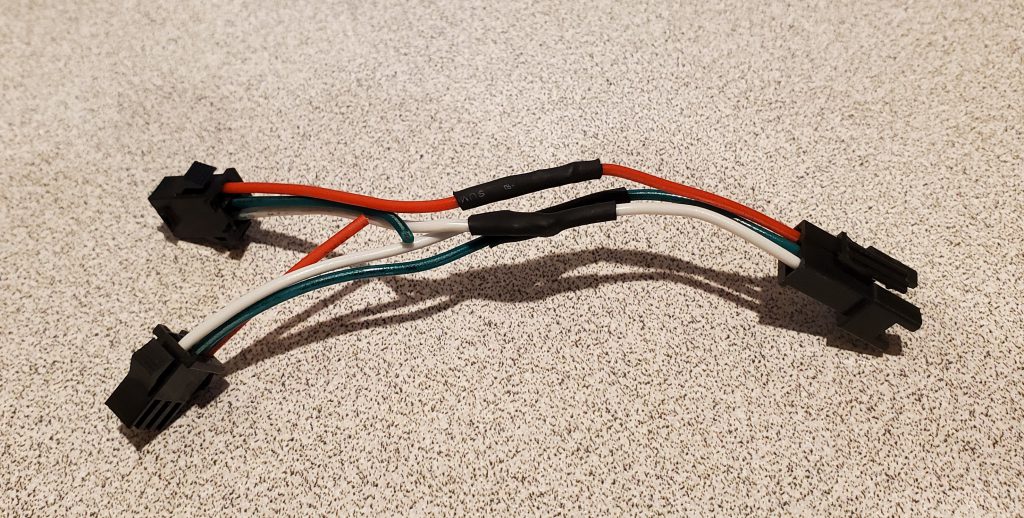
Close up of the “Wiring Bundle” (the piece that combines [5V power + ground] with [signal + ground] into one 3-pin connector):